- +86-13775339109
- Jessica@nq-fiberglass.cn
- No 61 Fangxian, Danyang, Jiangsu
Looking to create custom molds with ease? In this guide, we’ll show you how fiberglass—thanks to its light weight, strength, and durability—makes the perfect material for mold making.
With years of use in industries from automotive to art, fiberglass offers unmatched versatility. Whether you’re a hobbyist or professional, this material can help you create high-quality molds that last.
Our experience with fiberglass mold-making has helped countless creators achieve their goals. By following a few simple steps, you’ll avoid common mistakes and improve your results.
Ready to dive into the process? Let’s explore how you can get started with fiberglass molds and take your projects to the next level.
Table of Contents
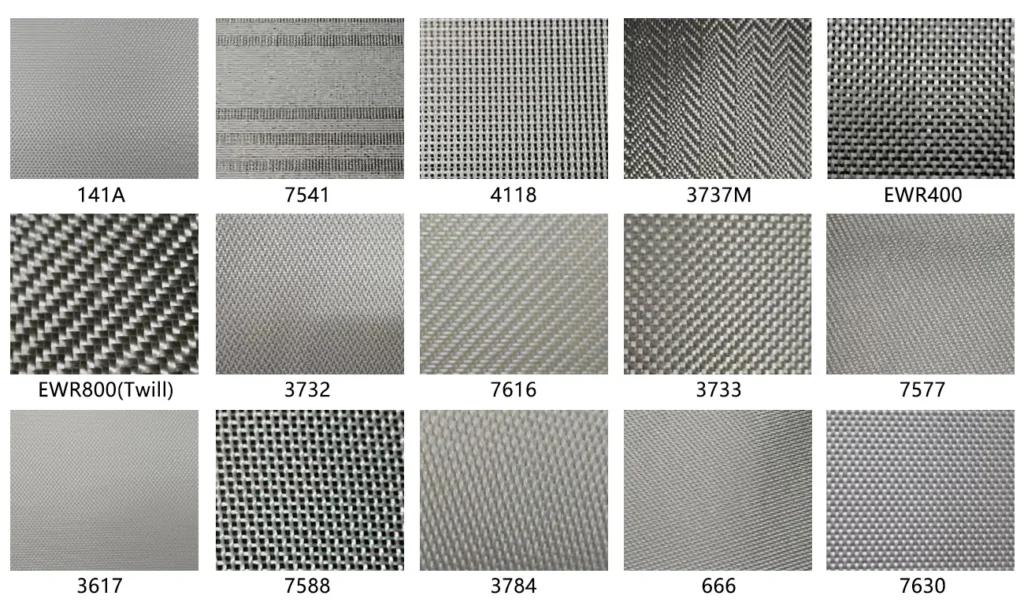
ToggleThere are several types of fiberglass fabric, each suited for different applications:
For most mold-making projects, woven fiberglass is generally the best choice. If you’re looking for high-quality, reliable fabric, our NQ woven fiberglass fabric is known for its superior strength and consistency. This could be an excellent option if you’re aiming for a durable, precision mold.

The two main types of resin are epoxy and polyester:
Be sure to pair the resin with the correct hardener for proper curing. Follow the manufacturer’s instructions for mixing to ensure a solid, well-formed mold.
Gel coat is crucial for a smooth, glossy finish. It creates the outermost layer of the mold, protecting the fiberglass beneath and giving it a polished appearance. Applying a gel coat ensures your mold has a sleek, professional surface.
To ensure easy mold removal, use mold release agents:
These agents prevent the mold from sticking to the plug, saving time and effort during the de-molding process.
Flanges are essential for creating the mold’s boundary, especially in two-part molds. They ensure a clean, precise edge and help seal the mold halves together to prevent leaks during the molding process.
In addition to the main materials, you’ll need a few essential tools:
A plug is the original model that you’ll use to create your fiberglass mold. It’s the exact shape you want your mold to take, and once the mold is complete, the plug is removed, leaving behind a hollow, reusable structure.
When selecting materials for your plug, there are several suitable options, each with its own benefits:
Each material is suitable for different project needs, so select the one that best fits the size, complexity, and finish requirements of your mold.
After selecting your plug material, it’s important to prepare the surface to ensure a flawless mold. Here are the essential steps:
A clean, smooth plug ensures that your fiberglass mold will come out with the best possible finish.
Proper surface treatment is crucial for a successful mold. Follow these steps:
With the right preparation, your plug will be ready to create a high-quality fiberglass mold.
A clean and smooth plug is essential for a successful mold. Follow these steps to prepare your plug:
A well-cleaned and sanded plug ensures a flawless mold surface, free from defects.
To prevent the mold from sticking to the plug, it’s important to apply a mold release agent. Here’s how to do it correctly:
Proper application of the release agent ensures easy mold removal without damaging the plug.
To achieve a high-quality mold, the plug must be as smooth as possible. Here are some techniques to refine the surface:
A smooth plug surface is key to achieving a high-quality fiberglass mold with minimal flaws.
Gel coat plays a crucial role in mold-making by providing a smooth, shiny finish and protecting the resin layer beneath. It serves as the outermost layer of the mold, ensuring a clean, polished surface. Without gel coat, the mold would lack durability and could have a rough, uneven texture. This protective layer also enhances the mold’s strength, ensuring it holds up under repeated use.
Applying gel coat properly ensures your mold has a smooth, flawless surface. Follow these steps for best results:
A thin, even layer of gel coat ensures a smooth, professional-looking finish on your mold.
Proper curing is key to achieving the best results. Here’s how to cure your gel coat:
Following the curing instructions ensures that the gel coat fully hardens and provides maximum protection and a shiny finish.
One-piece molds are the simplest and quickest type of mold to create. They are perfect for basic, single-surface shapes and require fewer steps. These molds are often used for projects where the part has no undercuts or complex features, making them ideal for beginner mold makers. The simplicity of one-piece molds also makes them cost-effective and quick to produce.
For more complex shapes with undercuts or intricate details, two-piece molds are the go-to solution. These molds consist of two separate halves that come together to form the final shape. Once the fiberglass layers are applied to both halves, the mold is carefully separated to reveal the finished part. This type of mold is ideal for parts that require greater precision and complexity, allowing for easy removal of the finished product.
Open molds are typically used for flat or shallow parts that don’t require full encapsulation. The item being molded is left exposed on one side, making it easier to create simple, low-profile shapes. Open molds are perfect for objects like panels, tiles, or decorative items where only one surface is required. This type of mold is also less time-consuming and cost-effective for straightforward projects.
Closed molds fully encapsulate the part being molded, providing complete coverage on all sides. These molds are typically used for high-precision parts that require perfect detail and strength. With a closed mold, resin is injected into a mold cavity, creating a high-quality, durable part. This method is commonly used for automotive parts, aerospace components, and other critical applications where both the surface and structural integrity must meet high standards.
Each type of mold offers distinct advantages depending on the complexity and requirements of your project. By choosing the right mold for your needs, you can achieve a better result and streamline the mold-making process.
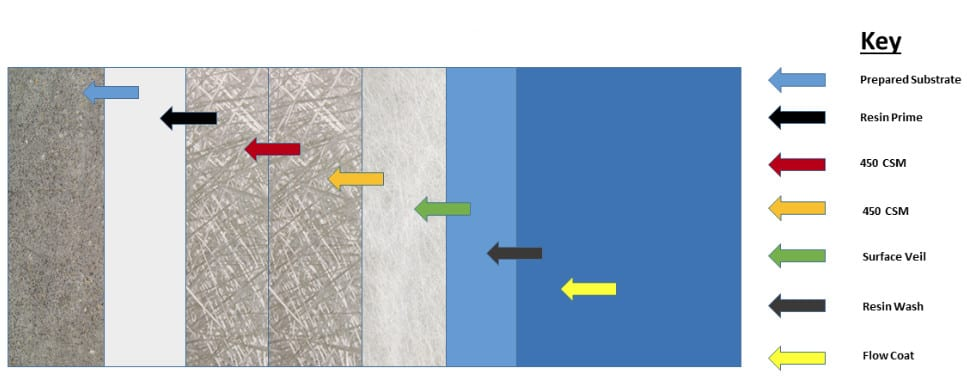
Finish with Resin: After you’ve built up the layers, apply a final coat of resin to seal the mold’s surface and create a smooth finish.

By following these steps, you’ll create a strong, durable fiberglass mold that’s ready for use. Make sure to maintain the right environment for proper curing to get the best results.
Mold release agents play a crucial role in preventing the mold from sticking to the plug. By creating a barrier between the plug and the fiberglass layers, they ensure that the mold can be easily removed without damaging its surface. Without a release agent, the mold would bond to the plug, potentially ruining both.
Each type has its own advantages and challenges, so consider your project’s specific needs when choosing a release agent.
Type | Description | Pros | Cons | Best Use |
Wax-Based Release Agents | Common choice, provides a high-gloss finish. | Easy to apply; glossy finish | Hard to remove; needs multiple coats | General mold-making |
Silicone-Based Release Agents | Easy to apply, creates smooth surface, allows faster mold removal. | Quick release; smooth finish | May leave residue affecting finish | Complex molds |
PVA (Polyvinyl Alcohol) | Water-soluble, forms thin film over surface. | Ideal for composite molds | Can leave rough finish; may require sanding | Composite molds |
Teflon-Based Release Agents | High-temperature resistance for molds exposed to heat. | Resistant to extreme heat | Usually more expensive | Automotive, aerospace industries |
By applying mold release agents correctly, you’ll prevent mold sticking, ensuring that your fiberglass mold is easy to remove and has a flawless surface for further use.
The right time to remove the plug is once the resin has fully cured and hardened. You should wait at least 24–48 hours after applying the final resin layer to ensure the mold is solid and stable. Gently pry the mold away from the plug, starting from the edges and working inward. Avoid using excessive force, as this can damage both the mold and the plug. If the mold feels resistant, give it more time to cure.
Once the plug is removed, inspect the mold carefully for any defects. Look for cracks, air bubbles, or uneven surfaces that could affect its functionality. If you notice any imperfections, they can often be fixed by sanding or applying additional resin layers to smooth out the surface.
After removing the plug, you’ll need to clean and smooth the mold to prepare it for casting or further use. Use a soft brush to remove any loose particles or debris. If there’s any excess resin or imperfections, lightly sand the surface to smooth it out. Be sure to wear safety equipment while sanding to avoid inhaling fiberglass dust.
Before using the mold for casting, do a final inspection. Check for any lingering imperfections, such as air bubbles or cracks, which could affect the final product. If necessary, patch up any defects by filling cracks with resin and smoothing the surface again. A flawless mold will ensure a high-quality cast.
Now that you know the basics, start by making a small project to practice. Experiment with different carbon fiber materials to improve mold strength and precision.
For more advanced techniques, check out our [guide on multi-layer carbon fiber mold making]. Start creating your own carbon fiber molds today!
Connect with an NQ expert to discuss your product needs and get started on your project.
Making a fiberglass mold typically takes 1 to 3 days, depending on the size and complexity. Simple, small molds can be completed within 24 hours, while larger or more complex molds may take over 3 days. Key steps include surface preparation, applying release agent and gel coat, laying fiberglass, resin curing, and demolding.
Yes, foam can be used to make fiberglass molds. It’s ideal for shaping complex plugs or prototypes. Use polyurethane or sealed polystyrene foam, and ensure the surface is sealed before applying resin to prevent melting or deformation.
Epoxy resin is the best for DIY fiberglass molds—strong, low-shrinkage, and foam-safe. Use polyester resin only if cost matters and foam isn’t involved.
To prevent air bubbles when applying fiberglass resin:
Work in a warm, dust-free area for best results.
Yes, fiberglass molds can be used for casting. They are strong, lightweight, and suitable for materials like:
Ensure the mold is well-cured, reinforced, and coated with a release agent before casting to avoid sticking or damage.